
ChatGPT
OmniHubs lets you connect ChatGPT directly to your Voice Bots and AI Agents. Once connected, your bots can use ChatGPT to understand questions and reply in a more natural, human like way.
What is ChatGPT Integration?
ChatGPT is a large language model (LLM) developed by OpenAI. It is trained on large amounts of text data, which allows it to understand questions, follow context, and generate human-like responses in a conversation. By connecting it to OmniHubs, your Voice Bots and AI Agents can use ChatGPT as their underlying AI handling questions, generating responses, and holding smarter conversations.
To connect ChatGPT, you will need an API key from OpenAI. Think of an API key as a password that lets OmniHubs talk to your OpenAI account securely.
When Should You Use This?
Use ChatGPT Integration when:
You want your Voice Bot or AI Agent to give smarter, more natural responses
You already have an OpenAI account and want to use it with OmniHubs
You are managing multiple bots and want to use different OpenAI keys for each one
Before You Begin
Before starting, make sure you have:
A OmniHubs account
An OpenAI account with a credit card added and billing credits available
If you do not have an OpenAI account or API key yet, start with Part B below first, then come back to Part A.
Step-by-Step Instructions
Part A: Connect ChatGPT with OmniHubs
Step 1: Open the Integrations Page
The Integrations page is where you connect third-party tools like ChatGPT to your OmniHubs account.
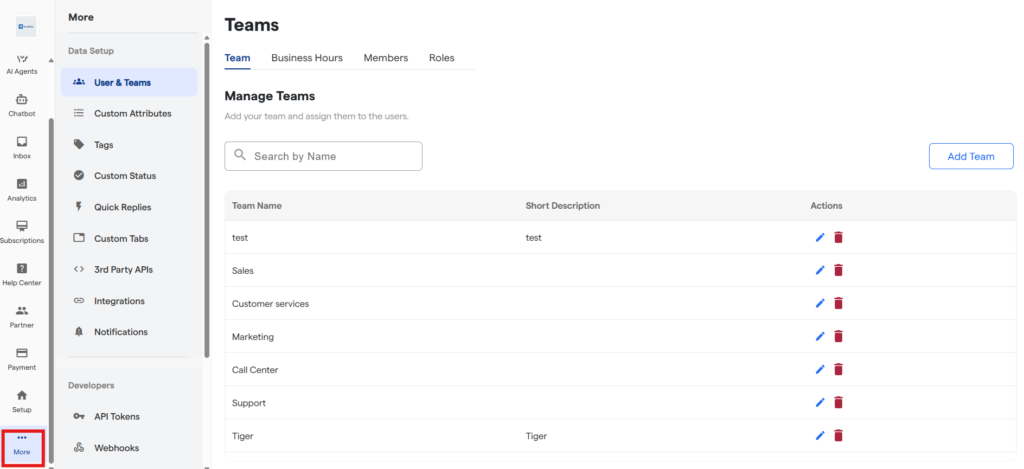
Look at the left side of your screen. At the bottom of the menu, click More — this is the icon with three dots.
2. After navigating to More. Click Integrations.
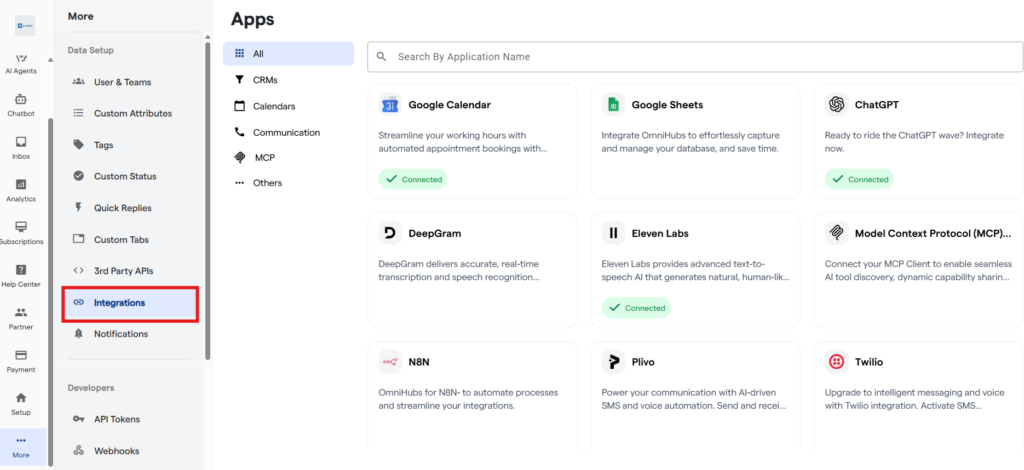
3. You will see a list of all available integrations. Find ChatGPT by scrolling or typing its name in the search bar at the top.
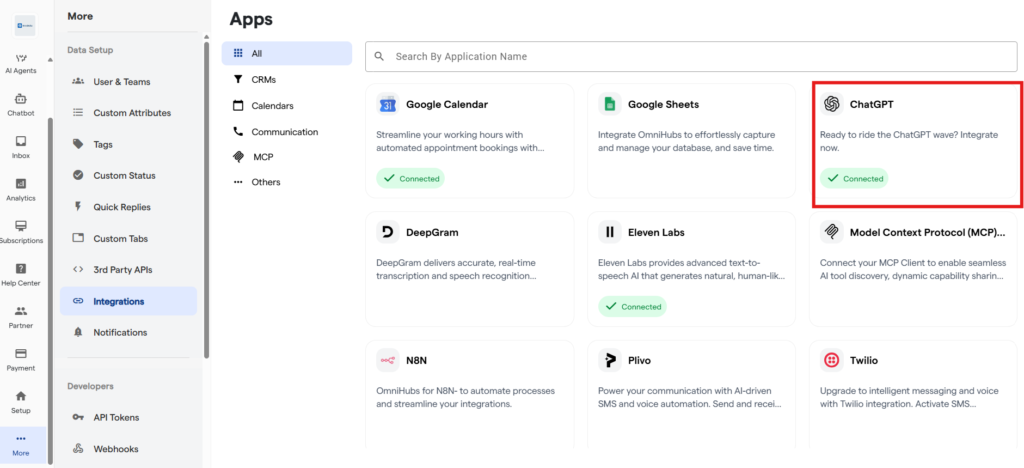
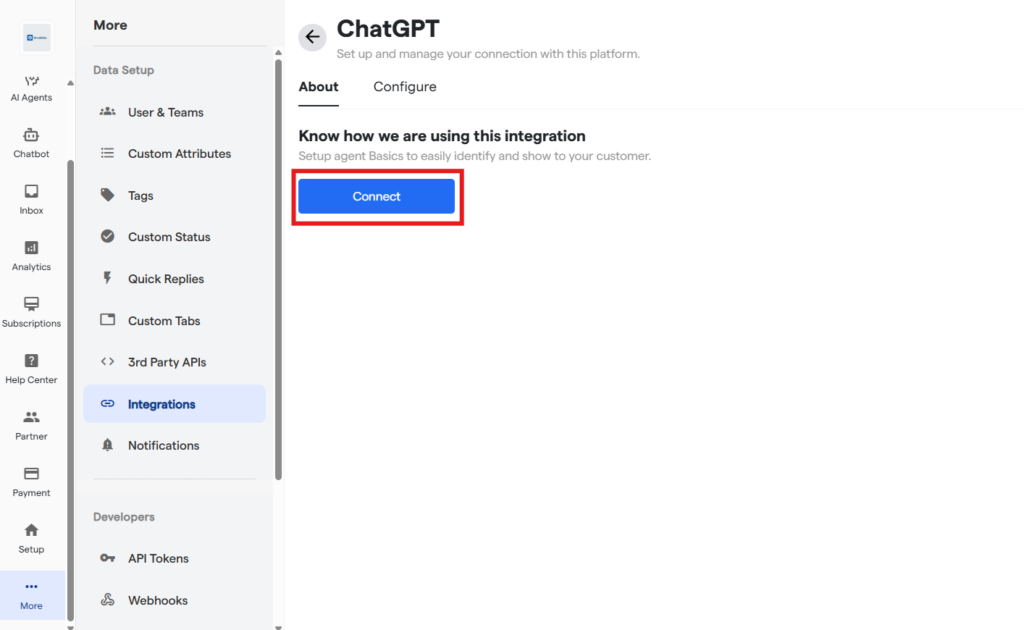
4. Click on the ChatGPT card and then click Connect.
Step 2: Open the Configuration Form
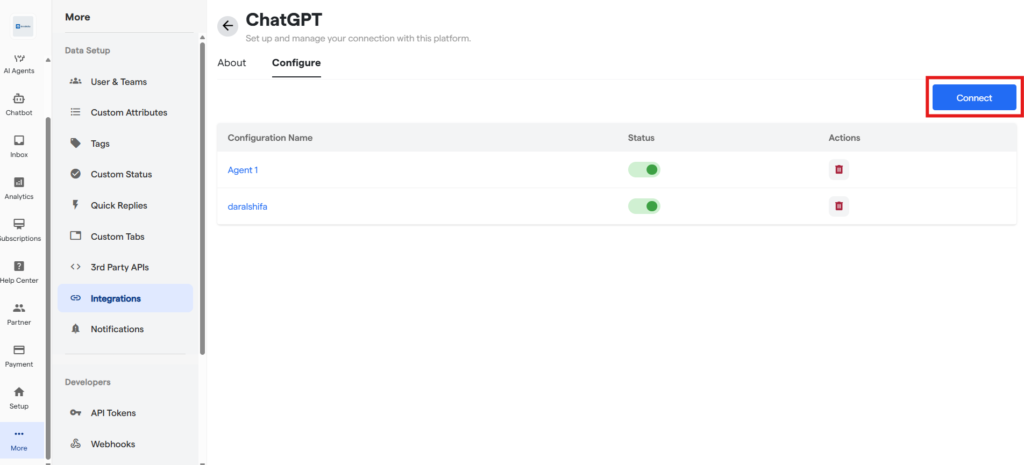
1. Click the Connect button on the top right. This opens the configuration form.
Step 3: Fill in the Configuration Form
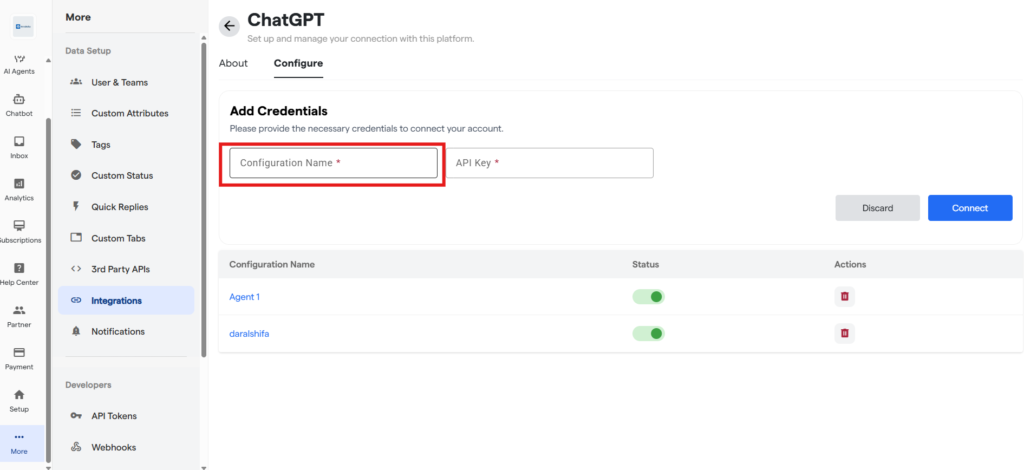
The form has two fields:
Configuration Name This is just a label to help you recognise this connection later. It does not affect how the integration works.
Give it a name that tells you which key or bot it belongs to. For example:
- Voice Bot Key
- Main OpenAI Account
- Sales Agent GPT
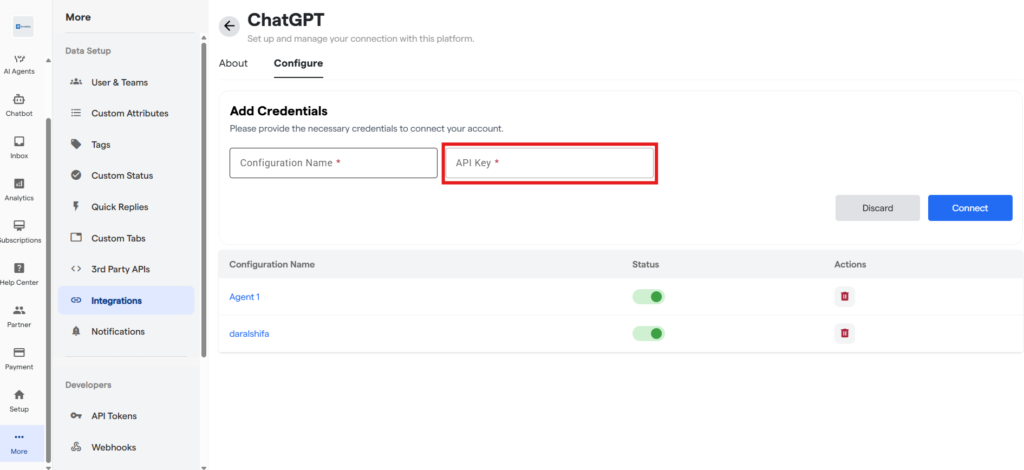
API Key
This is the secret key you get from your OpenAI account. It is what allows OmniHubs to connect to ChatGPT on your behalf. Paste it here exactly as copied — do not add any extra spaces.
Step 4: Save the Configuration
Once both fields are filled in, click Connect.
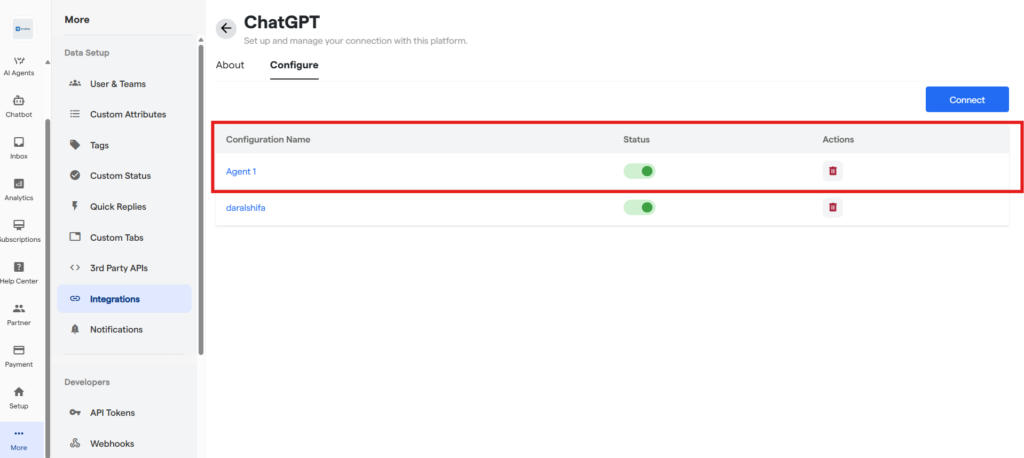
If the key is valid, the configuration will be saved and appear in the list below the form. You will see the following columns:
| Column | What it means |
|---|---|
| Configuration Name | The name you gave this connection |
| Details | Click the info icon to see which API key is linked |
| Status | A toggle switch — green means active, grey means paused |
| Actions | A delete icon to remove the configuration permanently |
💡
Use the Status toggle to pause a configuration without
deleting it. This is useful if you want to switch keys temporarily.
Part B: Get Your OpenAI API Key
Follow these steps if you do not have an OpenAI API key yet.
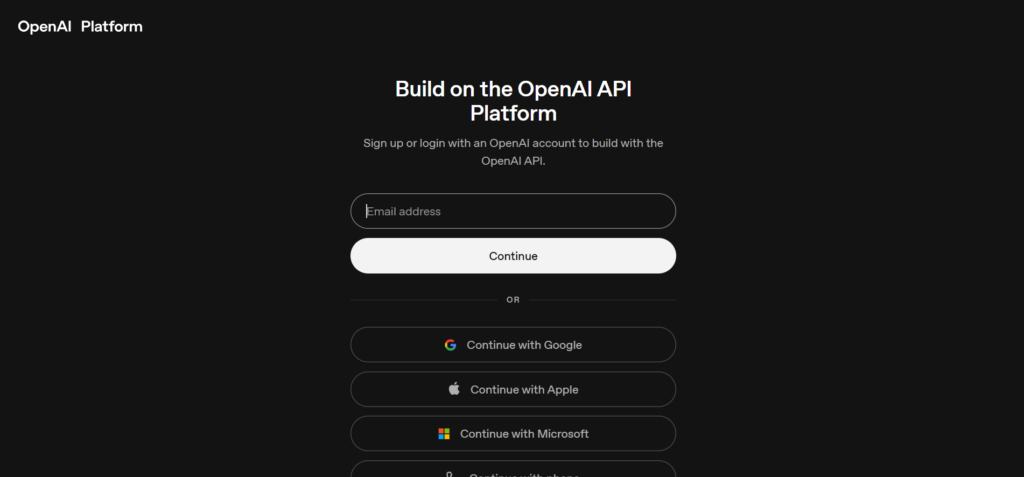
Step 1: Go to the OpenAI Platform
Open your browser and go to platform.openai.com.
Log in with your OpenAI account. If you do not have one, click Sign Up and create a free account first.
Step 2: Go to the API Keys Section
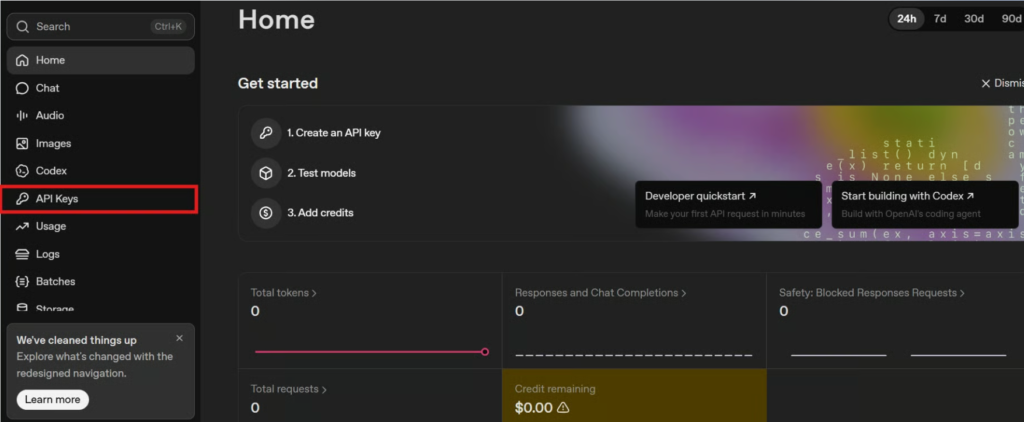
Once logged in, look at the left sidebar on the screen.
Click on API Keys. If you cannot find it, use the search bar at the top and type “API Keys”.
Step 3: Create a New Key
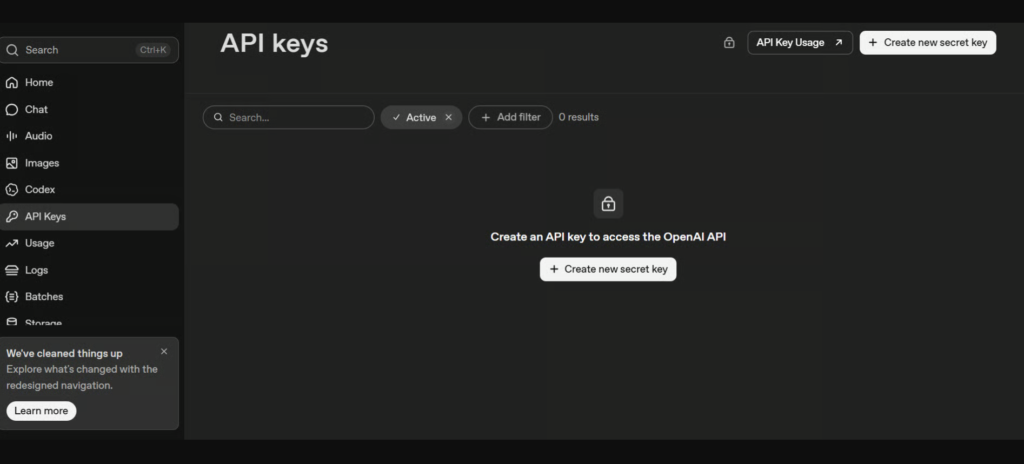
On the API Keys page, click the Create new secret key button.
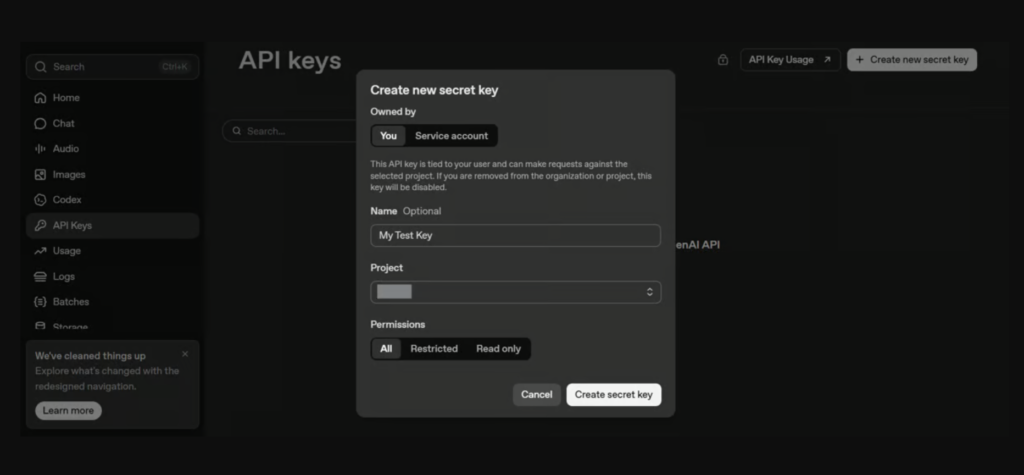
A small form will appear asking for:
Name (optional) — a label for this key, like OmniHubs Key
Project — select the OpenAI project this key will be used with
Click Create secret key when done.
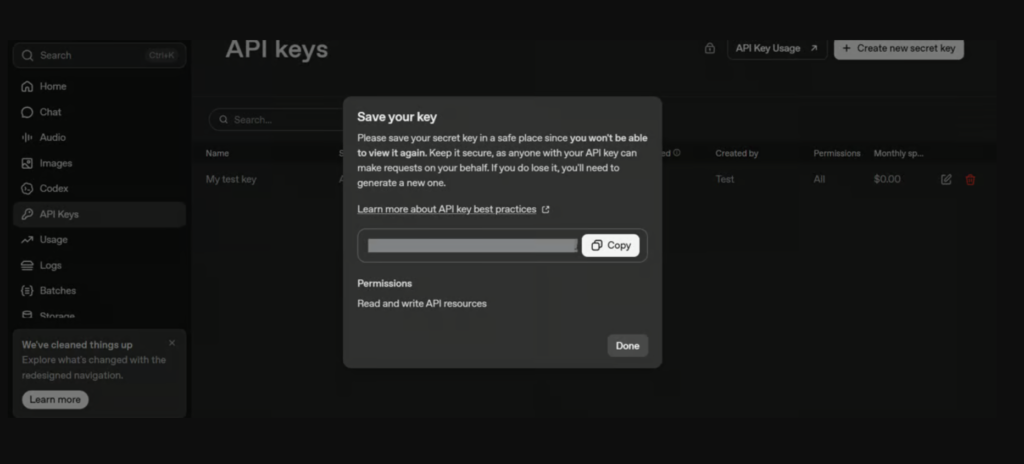
Step 4: Copy and Save the Key
Your new key will appear on screen. It looks like a long string of letters and numbers.
Copy it immediately and save it somewhere safe — a notes app, a password manager, or a secure document. OpenAI will never show this key again once you close this window.
Step 5: Add Billing Credits to Your OpenAI Account
Your API key will not work until you add a payment method and credits to your OpenAI account. Without this, ChatGPT will return errors even if the key is entered correctly.
In the left sidebar, click Billing.
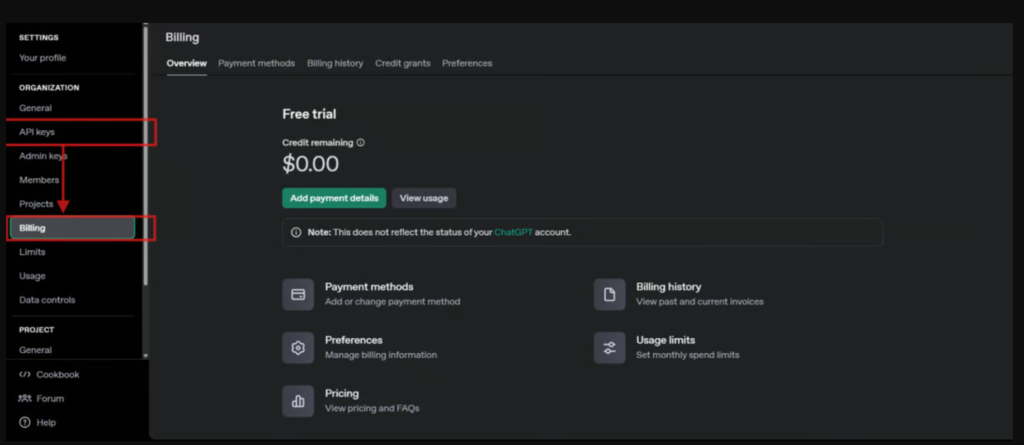
Click Add Payment Details.
Enter your credit card information and save.
💡
OpenAI accepts credit cards only. Once billing is set up, your API key becomes active and ready to use.
Now go back to Part A, Step 3 and paste this key into OmniHubs.
Best Practices
💡
Name each configuration clearly so you know at a glance which OpenAI key it uses and which bot it is for.
💡
Set up billing on OpenAI before testing — most connection errors happen because credits are missing.
💡
If you want to stop using a configuration temporarily, use the Status toggle instead of deleting it.
💡
If you manage multiple bots with different OpenAI accounts, create a separate configuration for each key.
💡
Save your API key the moment it is generated. There is no way to retrieve it from OpenAI after you close the creation window.
What Might Go Wrong
| Situation | What Happens |
|---|---|
| API key copied with an extra space | OmniHubs cannot verify the key and the connection fails |
| No billing credits on OpenAI | The key appears connected but returns errors during conversations |
| Key was deleted or revoked in OpenAI | The integration stops working even though it shows as connected |
| Status toggle is turned off | ChatGPT will not be available in any bot using that configuration |
Troubleshooting
The connection fails when I click Connect
Check that the API key was pasted correctly — no extra spaces at the start or end.
Log in to your OpenAI account and confirm the key has not been deleted or revoked.
Make sure your OpenAI account has billing set up and active credits.
If none of the above works, generate a new key in OpenAI and try again.
The key is connected but my bot is giving errors during conversations
Log in to OpenAI and check your billing — credits may have run out.
Confirm the key has not been restricted or revoked.
Go to Integrations, find the ChatGPT configuration, and make sure the Status toggle is turned on (green).
ChatGPT is not showing as an option inside my bot settings
Go to More → Integrations → ChatGPT and confirm the configuration was saved successfully.
Check that the Status toggle is green (active).
Refresh the page and check the bot settings again.
I cannot find my API key anymore
OpenAI does not allow you to view a secret key after it has been created.
You will need to:
Go back to your OpenAI account.
Generate a new key.
Update the configuration in OmniHubs with the new key.
FAQs
Which bot types can use ChatGPT Integration?
ChatGPT Integration works with Voice Bots and AI Agents on OmniHubs.
Can I connect more than one API key?
Yes. You can create multiple configurations, each with a different API key.
Each configuration can be managed and toggled independently.
What happens if my OpenAI credits run out?
Your bot will start returning errors during conversations.
Log in to OpenAI, go to Billing, and add more credits to restore the connection.
Can I pause a configuration without deleting it?
Yes. Use the Status toggle next to the configuration in the list.
Turning it off pauses the configuration without removing it.
My key looks correct but is still not working — why?
A few things to check:
The key may have been revoked inside OpenAI.
It may belong to a project with restricted permissions.
It may have been pasted with an invisible extra character.
Try generating a fresh key and connecting again.
Which ChatGPT models are available?
The available models depend on your OpenAI account access.
Common options include:
GPT-3.5
GPT-4
GPT-4 Turbo
GPT-4o
Assistants API models
You can select the model inside your bot's AI settings after the integration is connected.
Support
If everything is correct and you are still unable to move forward, write to us at support@tandtglobal.net. We will respond back within 48 business hours.


